Time Lapse Photography
There are many ways to do time lapse photography. You can hire a company to do it for you, you can buy kits, or DIY it with various bits of equipment. There are also various cheap all-in-pone solutions on Amazon, however the image quality of these is often quite poor.
I’ve typically done time lapse using SLR based camera systems as they are relatively cheap, very high image quality (especially in low light conditions) and are customisable to what you need to do. Most of the work I’ve done is over several weeks so has been mains powered, though for shorter shots you can use a battery system to run them for a day or so.
When running a time-lapse it is essential to have more than one camera. This gives you a second angle (or close-up) to edit to, and more importantly gives you a backup in case of a power failure, SD card corruption, the camera getting moved or obstructed or any number of things that can happen over the course of several weeks. This setup is what i’ve used most often, and is best suited to shorter time lapse sequences, i.e 1 day to 1 month.
A typical time lapse kit consists of:
Canon 550 Digital SLR camera with mains power supply (you can buy these second hand really cheaply nowadays)
Wide angle lens (eg 10-24mm) or 18-55mm lens (depending on how close you are to your subject, though typically a wide angle lens is more useful)
Lens is fitted with a UV (to reduce ultraviolet light over-exposing the shots, and to protect the glass front of the lens) and a ND filter (to allow longer exposures during day list to avoid jerky motion)
Intervalometer in waterproof bag
Manfrotto Magic Arm
128GB SD card (which fits 4,712 RAW photos, 128GB is the maximum size compatible with the 550)
The kit is not waterproof, but can be used outdoors if weather protection can be implemented. Care should be taken to avoid rain landing on the lens.
Notes on shooting time lapse
Shoot more often than you need
It may feel like shooting one shot every day will be useful to show progress. But in reality, progress tends to happen in fits and bursts, and in your eventual edit you will want to edit out all the bits where nothing much is happening, and focus more on when something does happen.
When something happens, it can often be over and done relatively quickly. Our eventual film might run at 25 frames per second - 25 photos per second. To get a sense of an event happening it might want to last more than a second or two in our film. If an event takes place over two hours, for it to take up 2 seconds of our film we need to take 50 photos of it (25 frames per second x 2 seconds). That equates to taking a photo every 144 seconds (2 hours = 7200 seconds. 7200 seconds divided by 50 photos = 144 seconds between each photo). Even then, we may miss some crucial action between those shots so it might be safer to shoot even more shots, perhaps every 72 seconds. It’s worth remembering, you can always delete photos you don’t need, or you can speed up or edit footage that runs too slowly. But if you didn’t get a photo of it in the first place…
Relationship between shooting interval and storage space
A 18megapixel Canon 550D with a 128Gb SD card can store 4,712 RAW images.
Taking one shot every 480 seconds (8 minutes) means a camera can run continuously for 26 days, 4 hours, 16 minutes before the card will be full.
Taking one shot every 240 seconds (4 minutes) means a camera can run continuously for 13 days, 2 hours, 8 minutes before the card will be full.
Taking one shot every 120 seconds (2 minutes) means a camera can run continuously for 6 days, 13 hours, 4 minutes before the card will be full.
Taking one shot every 90 seconds means a camera can run continuously for 4 days, 21 hours, 48 minutes before the card will be full.
Taking one shot every 60 seconds means a camera can run continuously for 3 days, 6 hours, 32 minutes before the card will be full.
Taking one shot every 30 seconds means a camera can run continuously for 1 days, 15 hours, 16 minutes before the card will be full.
For a long run time-lapse, taking one shot every 30 minutes means a camera can run continuously for 98 days before the card will be full.
Shoot wider than you need
Often camera positions aren’t ideal, and may need rotating or transforming in the edit, which can steal some of the edges of the photo. Don’t zoom in too close as you’ll often end up loosing some of the edges of the image to allow it to be squared off.
If your end film is going to be in a normal HD format, be aware this typically has an aspect ratio of 16:9, whereas a DSLR shoots at a 4:3 ratio - this means you’ll crop out part of the frame when you edit it.
The camera could not be placed exactly centre to the building, so the image is slightly skewed. In post production it’s given a 1.5 degree rotation to make the far wall look parallel to the horizon.
Shoot as high a resolution as you can
Shooting in high resolution allows you to zoom in to each shot without losing quality. A Canon 550D photo is 5184 x 3456 pixels, whereas a HD video is 1920 x 1080 pixels. This means you can zoom in x2.5 without losing any quality.
This has been zoomed in, in Final Cut Pro, from the original frame, shown above, by 250% with no loss in quality.
What format will your film be in?
An SLR camera shoots at a 4:3 ratio. A HD film has a 16:9 ratio. If your film will be integrating with other video material, you may want to edit your film in a HD format, which means you’ll end up cropping out part of the image you shoot. Or if you are shooting a dedicated time lapse film, you can choose the aspect ratio that best suits your purpose. In the example films further below on this page, TL Concerts 2015 is in HD format, whilst TL Concerts 2016 is in a bespoke format that is closer in size to the image the camera captures. HD format, which is wide but not tall, is great for capturing wide panoramic images but isn’t great for things that are tall. Construction time-lapses typically involve things going up so having height available in the frame is important.
The original image. Note the edge of the roof that is visible in the shot in the bottom left. Note that SLR cameras shoot at a 4:3 ratio. A better camera position couldn’t be obtained but because I knew the final version would be HD, I knew the bottom section of the image wasn’t important.
In the final film, which is in a HD 16:9 ratio, the image has been rotated slightly, and cropped/zoomed in to fit into the narrower height HD format.
Shoot in RAW
Shooting in RAW means you can fit less images on an SD card but allows a lot of editing afterwards. Time Lapse shooting is unpredictable as environmental conditions change radically over time, so the more you can edit afterwards the better.
Shooting in JPEG means you can fit more images on an SD card but severely reduces how much you can edit the images afterwards. Notice how little detail you can see onstage, and the reduced contrast of the clouds in this version compared to the other.
Shot RAW and adjusted in post production. Notice how much more detail you can see onstage. and the increased contrast of the clouds in this version compared to the other. The image has also had some of the lens distortion corrected, which is more effectively done with RAW files - you can notice that the line of the roof curves up towards the left and right edges of the JPEG images, whereas it is more of a straight line in the RAW image
Motion blur
Use ND filters to allow the use of long exposures to create motion blur. But if you make it too long it can make people disappear into a blur, making them effectively invisible.
A strong 0.9 ND filter, with a f/10 small aperture, ensures the camera chooses a long exposure, here around 30 seconds, which creates great light trails for the forklift truck.
Here, the f/20 aperture is making the exposure too long, effectively making anything in motion disappear.
Camera set-up
The camera is set to Aperture-priority mode, so that the settings are fixed apart from the exposure time. High f/stops like f/20 can cause diffraction within the lens, which can lead to the image being blurrier than it should be. This is not perfect, especially with variable lighting conditions as many cameras jump exposure time from a 15 second exposure to a 30 second exposure, with nothing in-between, which can lead to images that need more post-production work.
When setting up it can be useful to take a regular battery and a spare SD card. This can help you check your camera is in a good position before you commit to fully cabling it up. Take a photo on a spare SD card and view it on a laptop to ensure it looks good on a big screen - it’s easy to miss that the focus is slightly off or that the framing is slightly askew. Or, you can take a HDMI monitor and plug it in to the camera HDMI output to check it.
Checklist:
Camera mode: A
F stop: *14*
ISO: 400
WB: Cloudy
Shooting in RAW
Metering: full frame
Focus: manual
SD card formatted and empty?
Is date and time set correctly?
Is eyepiece covered? (light entering the eyepiece can affect exposure metering - in normal use your eye covers up the eyepiece)
Is UV / ND filter in place?
Is lens hood and camera flag in place?
Is lens clean?
Is focused?
Does Intervalometer have fresh batteries and setup correctly?
Is camera, power supply and intervalometer protected from the elements?
Are there signs in place warning people not to touch the equipment?
Make a note of the date and time you set the camera, and set a calendar alert for when to change the SD card, or to check that all is well. Keep a log of all memory card changes.
Example films
This video is in HD 1920 x 1080 aspect ratio. The first 19 seconds only used 2 different camera angles, but with different zooms. There are 3 further angles in the next 30 seconds, one at the FOH mix position, and two onstage (well, the camera was in one position one night, and in another for another night).
This film uses a custom 1620 x 1080 ratio, which is closer to the native footage shot by the camera. It was shot over 2 weeks then edited down to one minute, using 4 cameras moving between a few different positions.
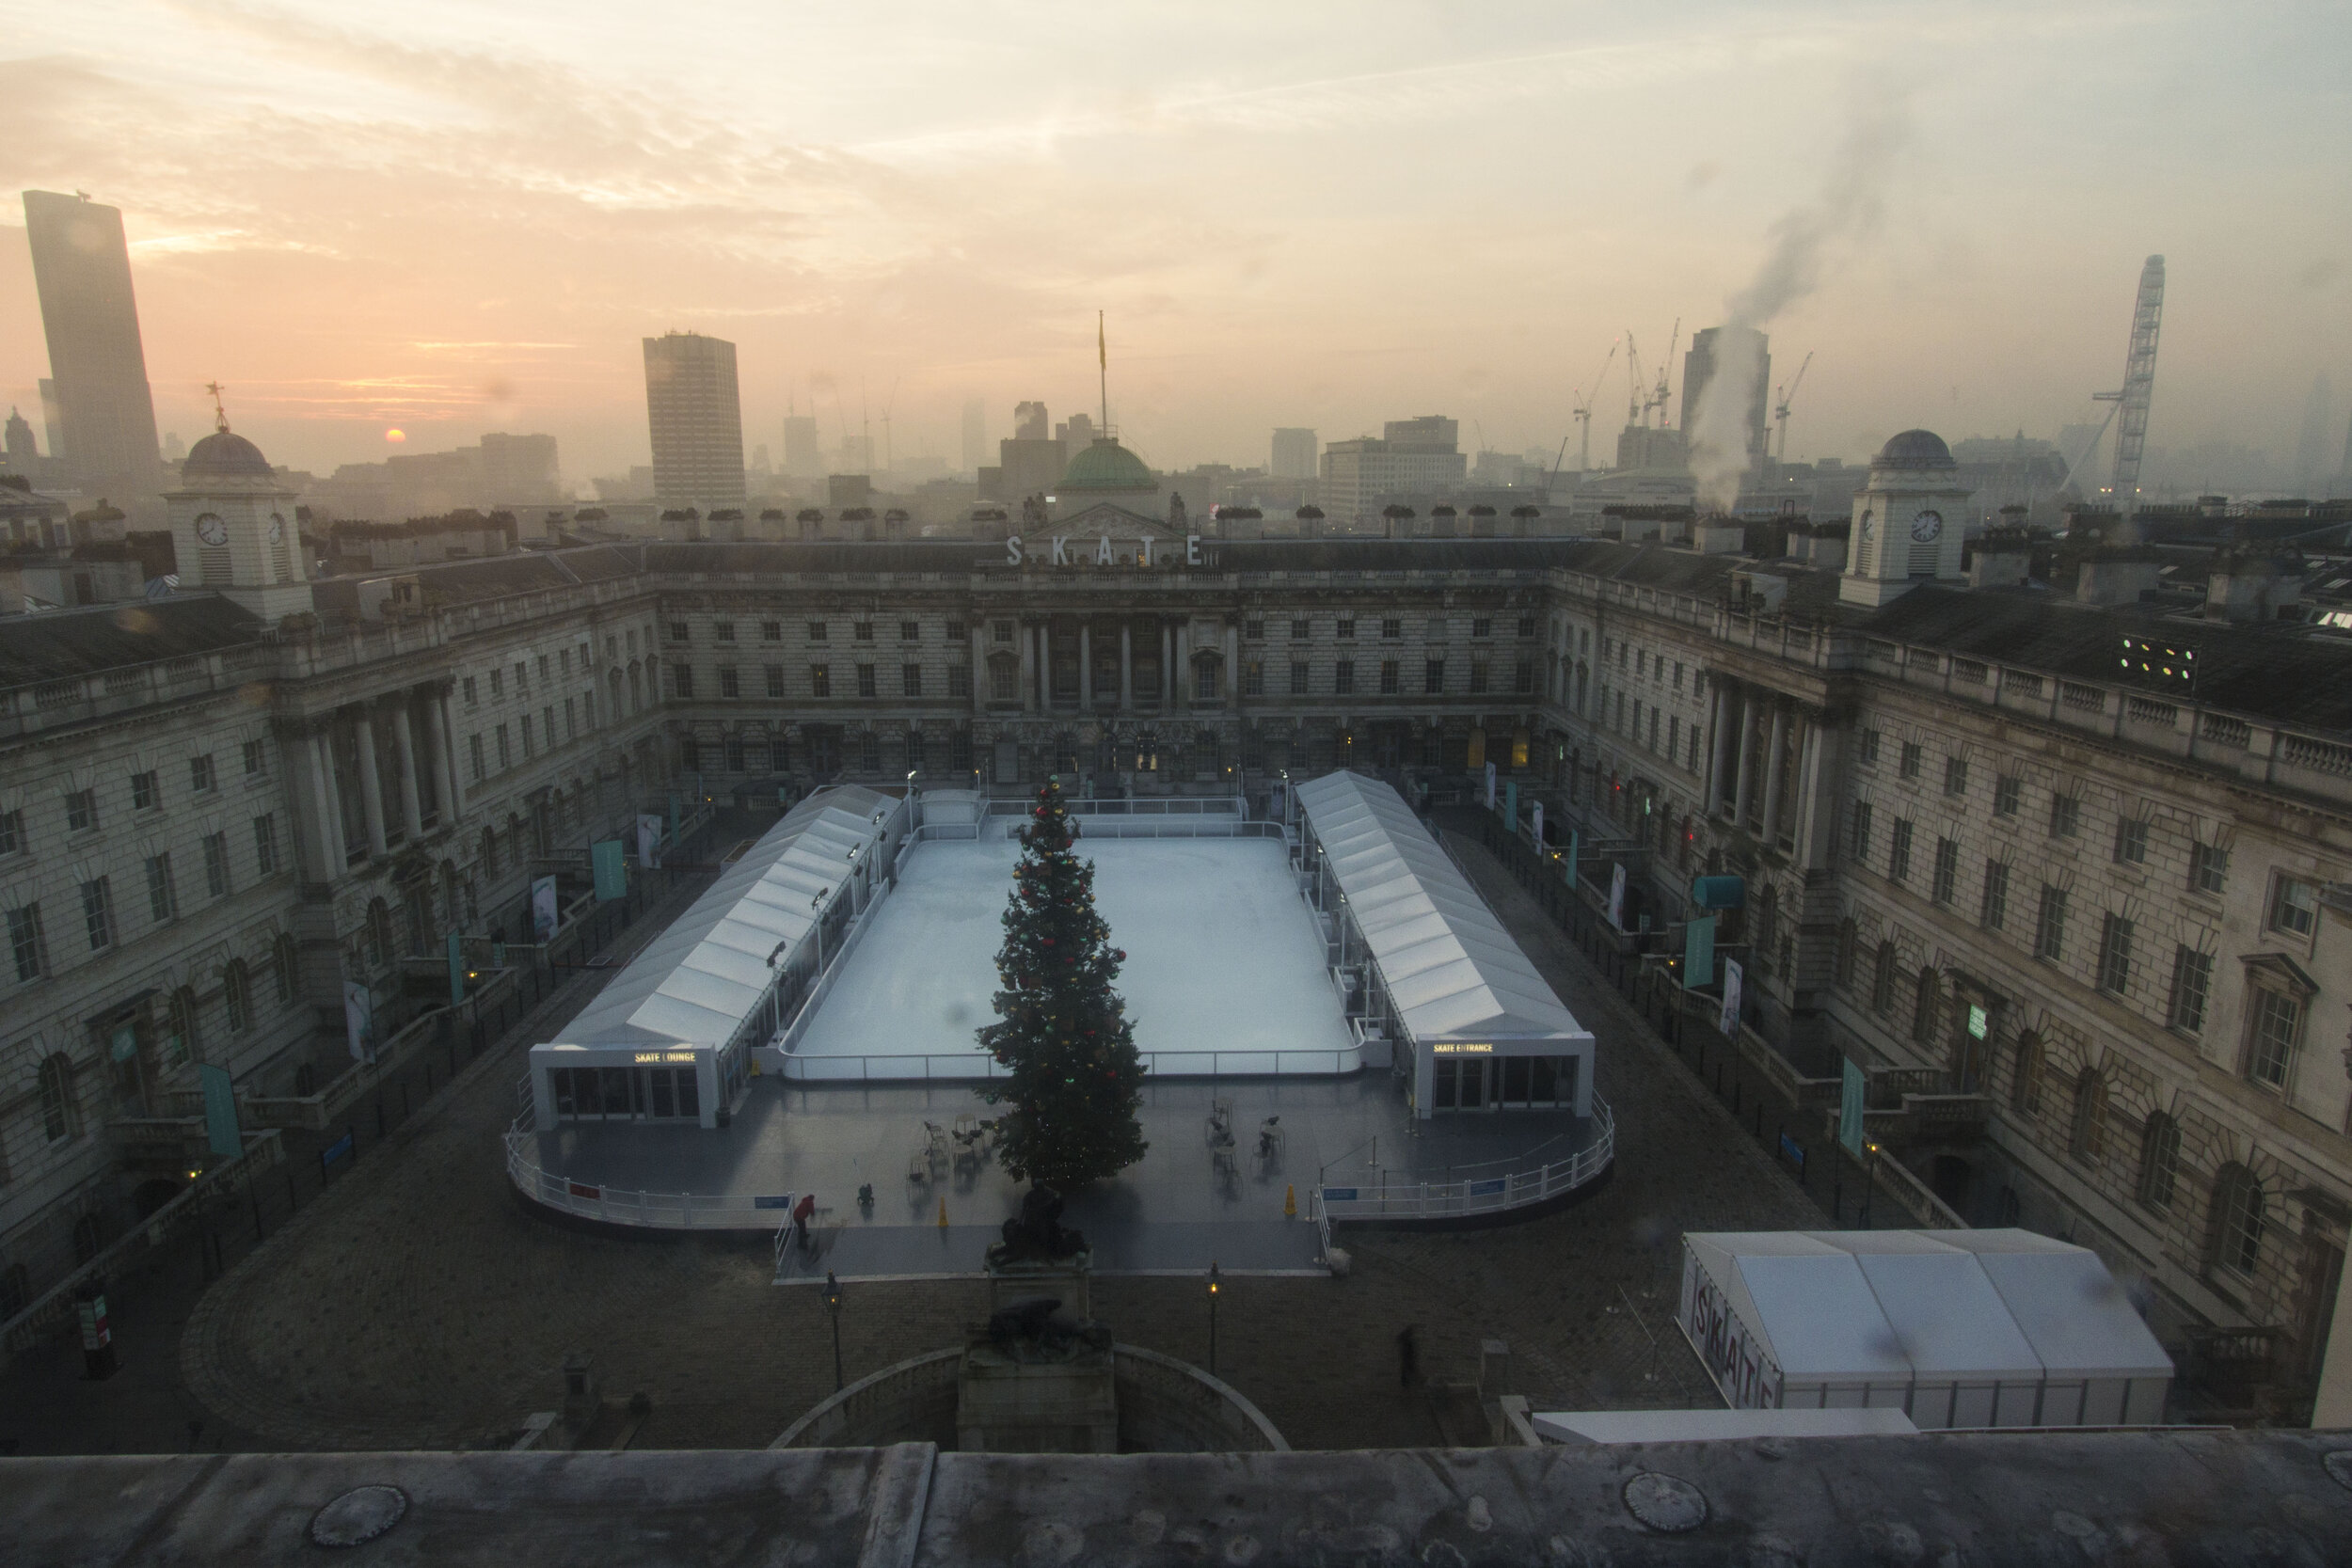
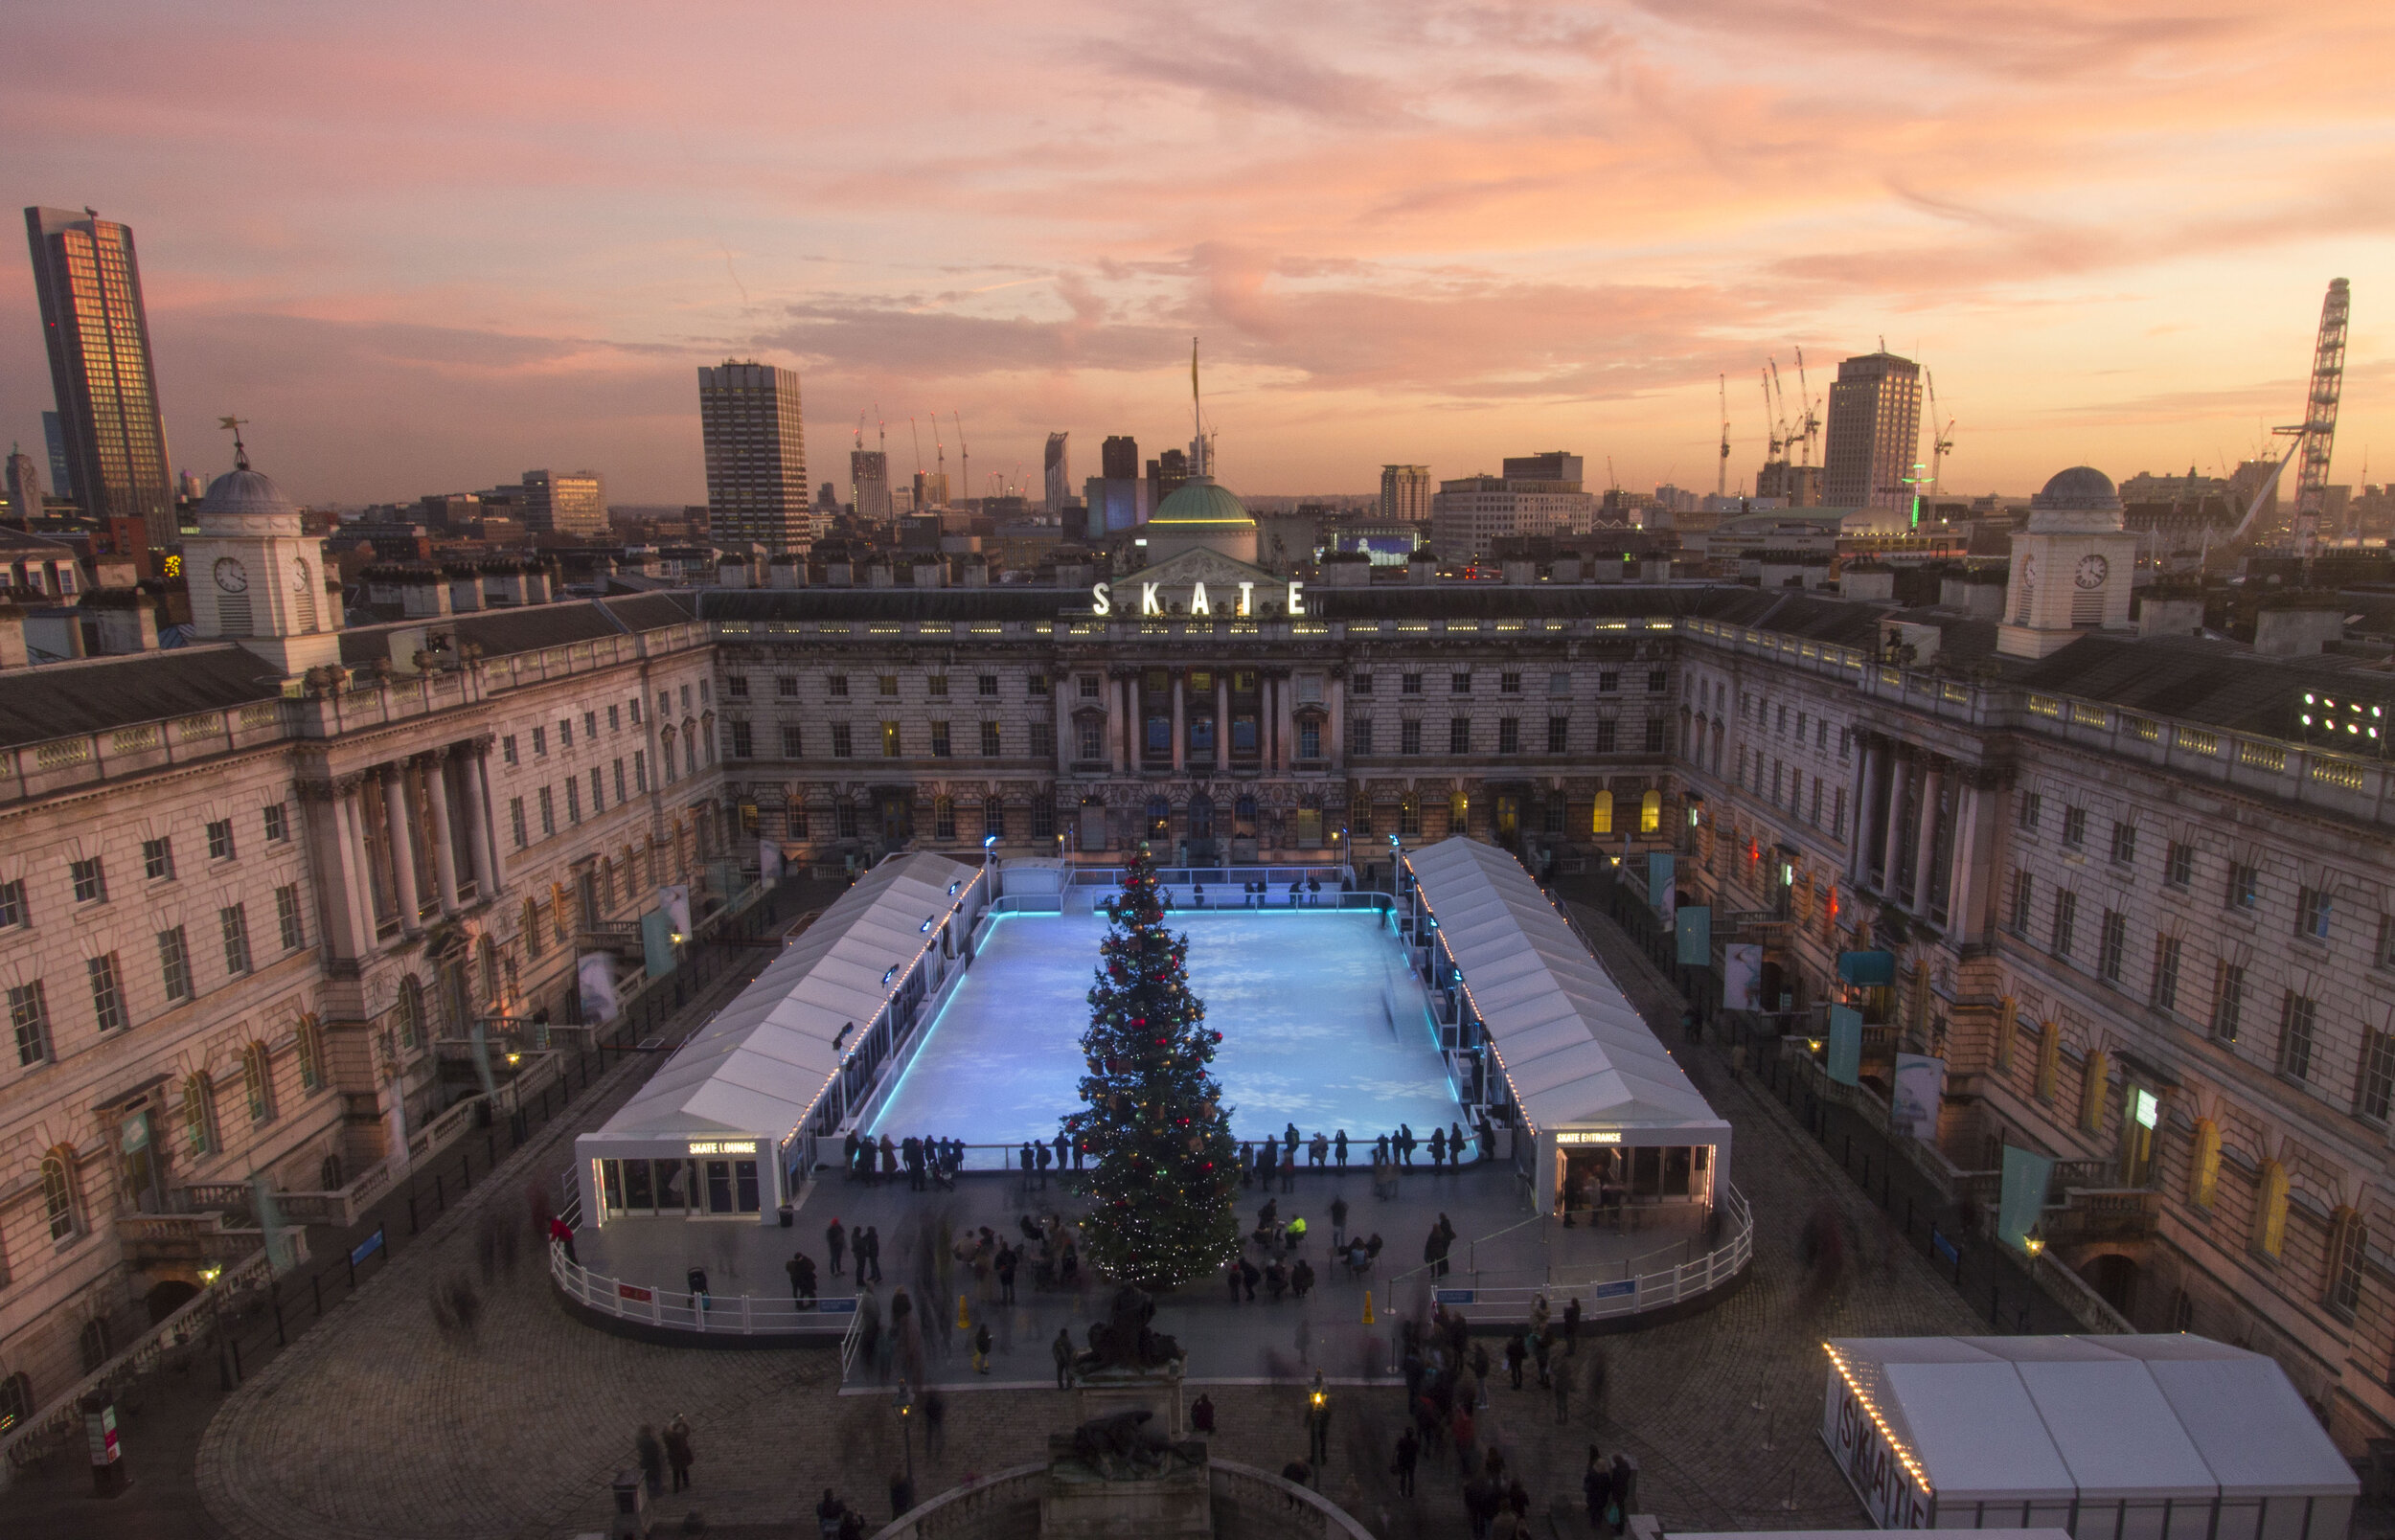
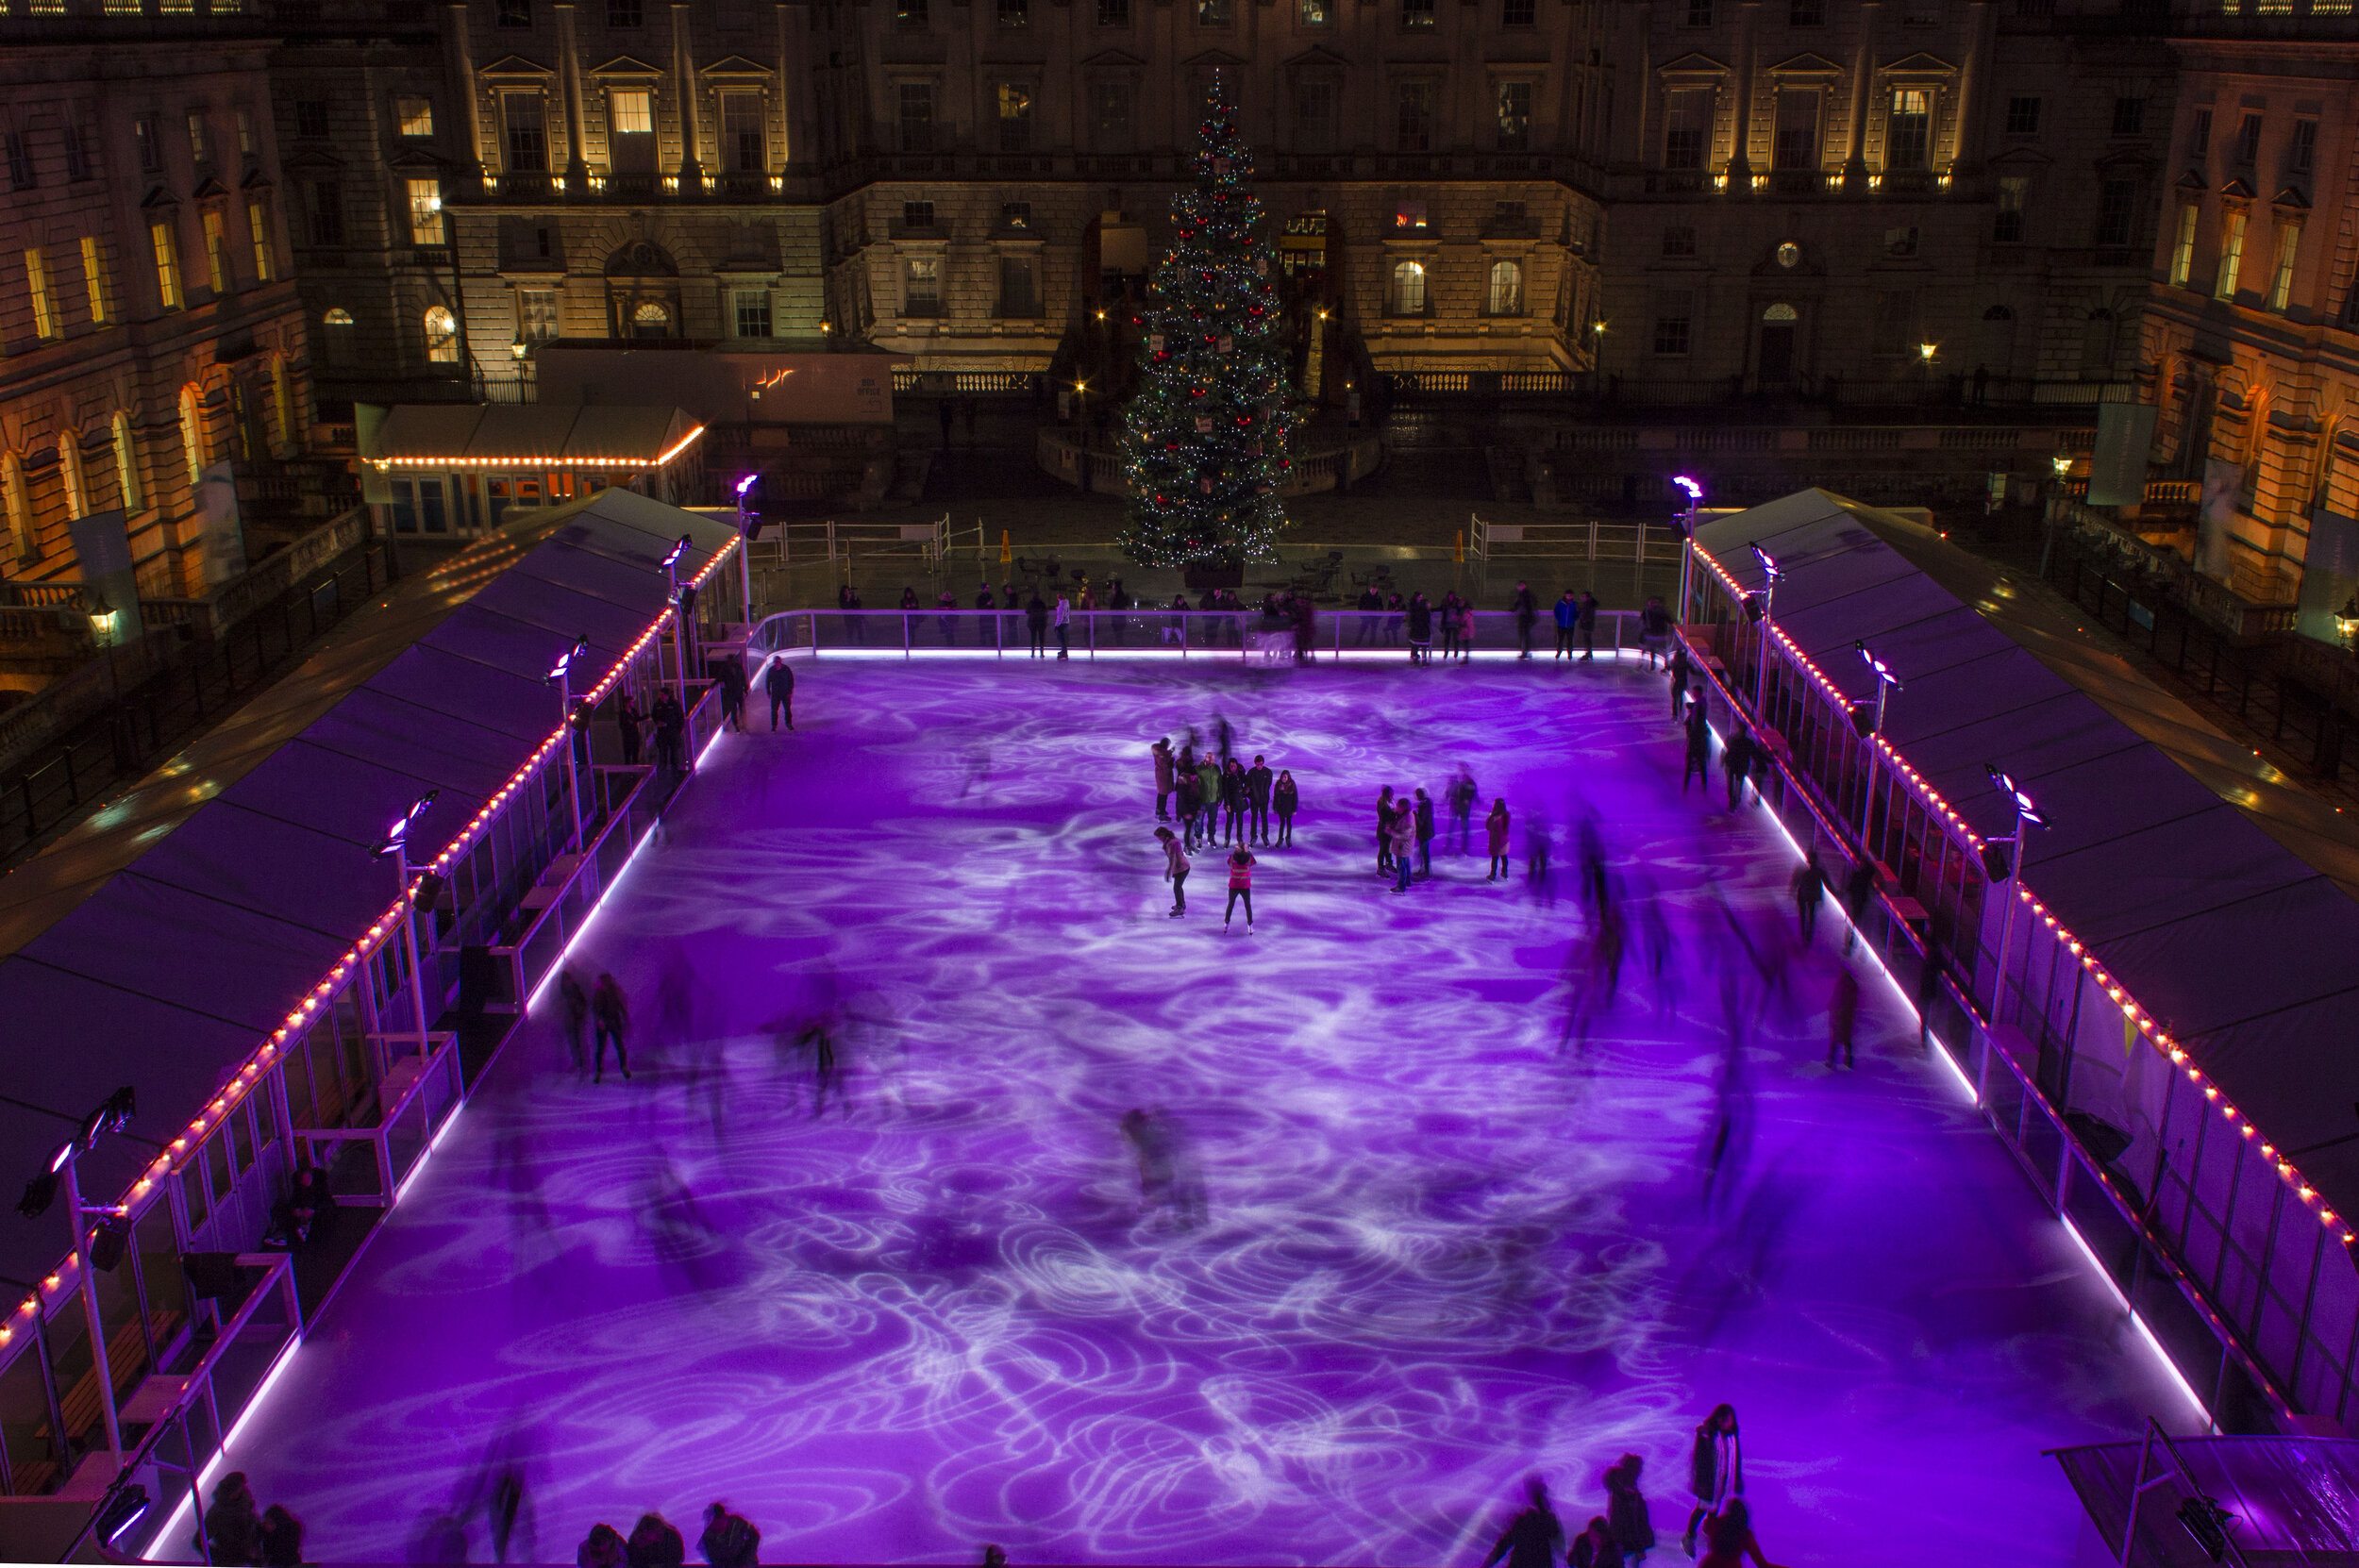
This film uses a 1920 x 1080 ratio. It was filmed with two cameras taking shots every 90 seconds over a month, taking over 50,000 shots in total.
The end section contains a section of long-term time-lapse, where a photo was taken every 30 minutes a day. which equates to 2 seconds of footage per day. The footage has then been sped up in post production.
Long term time lapse, photo every 30 seconds over 25 days. This was an exposed camera position in a weather proof box which means that rain significant ly effects the footage.
Attached to the rear of a Zamboney ice cleaning machine using a Manfrotto Magic Arm. The shooting interval is matched to the exposure time so it seems like almost continuous motion.
Mounted to a vertical pole, using balustrade to provide weather protection. A camera flag sits above the lens to provide additional protection from rain. The camera strap provides a second point of attachment.
A waterproof bag allows access and monitoring of the intervalometer, whilst a DriBox contains the mains power.
Don’t forget to explore your thousands of shots for great images. Here are a few of my favourites.